Connect between Apps in the same ASE: Adding internal CA certs to the trusted root store for Web Apps hosted in ASE
November 10, 2018
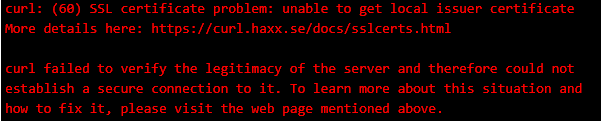
By default applications running in an App Service will only have the normal public CAs in the trusted root store. This means that SSL connections against endpoints with a privately issued certificate will fail as untrusted. One common error message in this scenario is "SSL Certificate problem: unable to get local issuer certificate".
A common scenario for this might be hosting 2 App Services inside an ILB ASE, one frontend and one backend, and making HTTPS calls from one -> to the other. Another scenario would be connecting from the Web App to an on-prem API secured with a self-signed or privately issued certificate.
The official Azure documentation is here: https://docs.microsoft.com/en-us/azure/app-service/environment/certificates#private-client-certificate.
The first step is to ensure that the target hostname is resolvable from the Web App, if it is hosted only in internal DNS. This step is possible for all App Services. Installing certs to the trusted root store is only currently possible using the more expensive App Service Environment (ASE).
Configure custom DNS to enable the Web App to resolve the internal hostnames
- By default the Web Apps inside the ASE will use Azure DNS for hostname lookups. If the hostname is a non-Internet resolvable hostname such as “backend.website.local” the HTTP request will fail on hostname lookup
- An easy test of this is from the Web App’s Kudu console using CURL or NAMERESOLVER commands against the target hostname. If these fail with an unable to resolve hostname error, the issue is DNS resolution

- The solution is to configure custom DNS on the ASE’s VNET, this can be done in the Azure portal. This custom DNS server will provide the DNS records for the target service. If this configuration is made after the ASE deployment, the entire ASE must be restarted to load the new configurations, this restart takes ~30 minutes to complete. https://docs.microsoft.com/en-us/azure/virtual-network/manage-virtual-network#change-dns-servers
- NOTE: you must use the NAMERESOLVER command on the Kudu console to test the custom DNS resolution. The Nslookup command does not use the app’s context to perform the DNS lookup.
- NOTE: a possible alternative to hosting an entire DNS VM is to use Azure Private DNS Zone to host the DNS records, a feature which is in public preview: https://docs.microsoft.com/en-us/azure/dns/private-dns-overview
- NOTE: instead of configuring the DNS servers on the VNET itself, an Application Setting of WEBSITE_DNS_SERVER and WEBSITE_ALT_DNS_SERVER with value of the server's IP can be created on each Web App.
Add the internal CA to the trusted root store of the Web App inside ASE
- Typically an ILB ASE will use an internally issued SSL certificate, issued from an internal CA. This CA is not trusted on the public Internet and HTTPS calls will fail on certificate validation using a privately issued certificate.
- An easy test of this is from the Web App’s Kudu console using CURL command against the target site over HTTPS. If these fail with an SSL validation errors, we can confirm that the issue is with the SSL connectivity
- You can also try the CURL command using the allow insecure flag, which will bypass the SSL check and output the HTTP response: curl -k https://backend.website.local
- To load the internal CA to the trusted root store to allow a client-server scenario where the cert is privately issued and the Web App is the client:
- You need to use an ASE. This does not work outside of an ASE.
- In the Azure Portal go to a Web App that needs the cert to be available.
- Prepare your cert as a cer file.
- Go to SSL settings in the app. Click Upload Certificate. Select Public. Select Local Machine. Provide a name. Browse and select your cer file. Select upload.
- Copy the thumbprint.
- Go to Application Settings. Create an App Setting WEBSITE_LOAD_ROOT_CERTIFICATES with the thumbprint as the value. If you have multiple you can put them in the same setting separated by commas and no whitespace
- Restart the Web App after making these changes to confirm that the changes are loaded
- The cert will be available by all the apps in the same App Service Plan as the app which configured that setting. If you need it to be available for apps in a different App Service Plan, you will need to repeat the App Setting operation in an app in that App Service Plan.
- If there are multiple certificates in the trust chain, all of them must be uploaded and loaded
- To check that the certificate is set successfully, go to the Kudu console and issue this command on the Powershell debug console: dir cert:\localmachine\root
- Once the certs are loaded to the trusted root store, the HTTPS connections should be successful all the way through.
- NOTE: the cURL command may still result in a failure at this point, because the newly applied certs do not impact the cURL tool. You can test your application to confirm the connectivity, or use a parameter to include the certs such as:
curl --cacert /wwwroot/certFileHere.crt https://backend.website.local
Good luck!